


I’ve had many requests..
…from TZ fans to help them build their own Mystic Seer. Below, I’ve provide some detailed drawings and in progress construction pictures. I will try to add additional information as I have time. Send me a note if you have any particular questions.
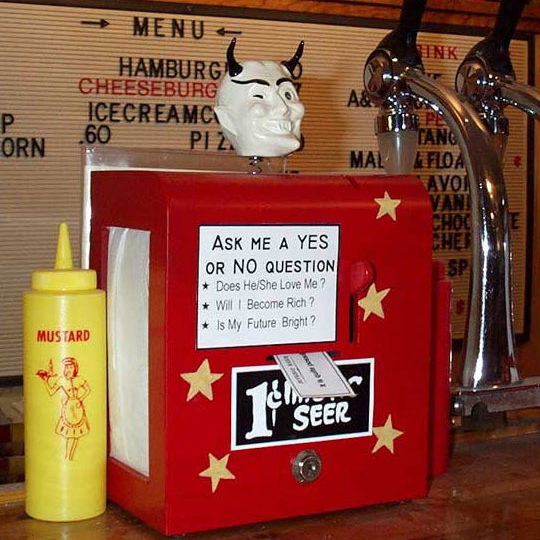
Now, my MS is not really operational. That is, it does not dispense the fortune slips. It does however have a working/spring loaded lever and will collect all the pennies you put into it. Also, the napkin holders are spring loaded and hold the napkins rather nicely.
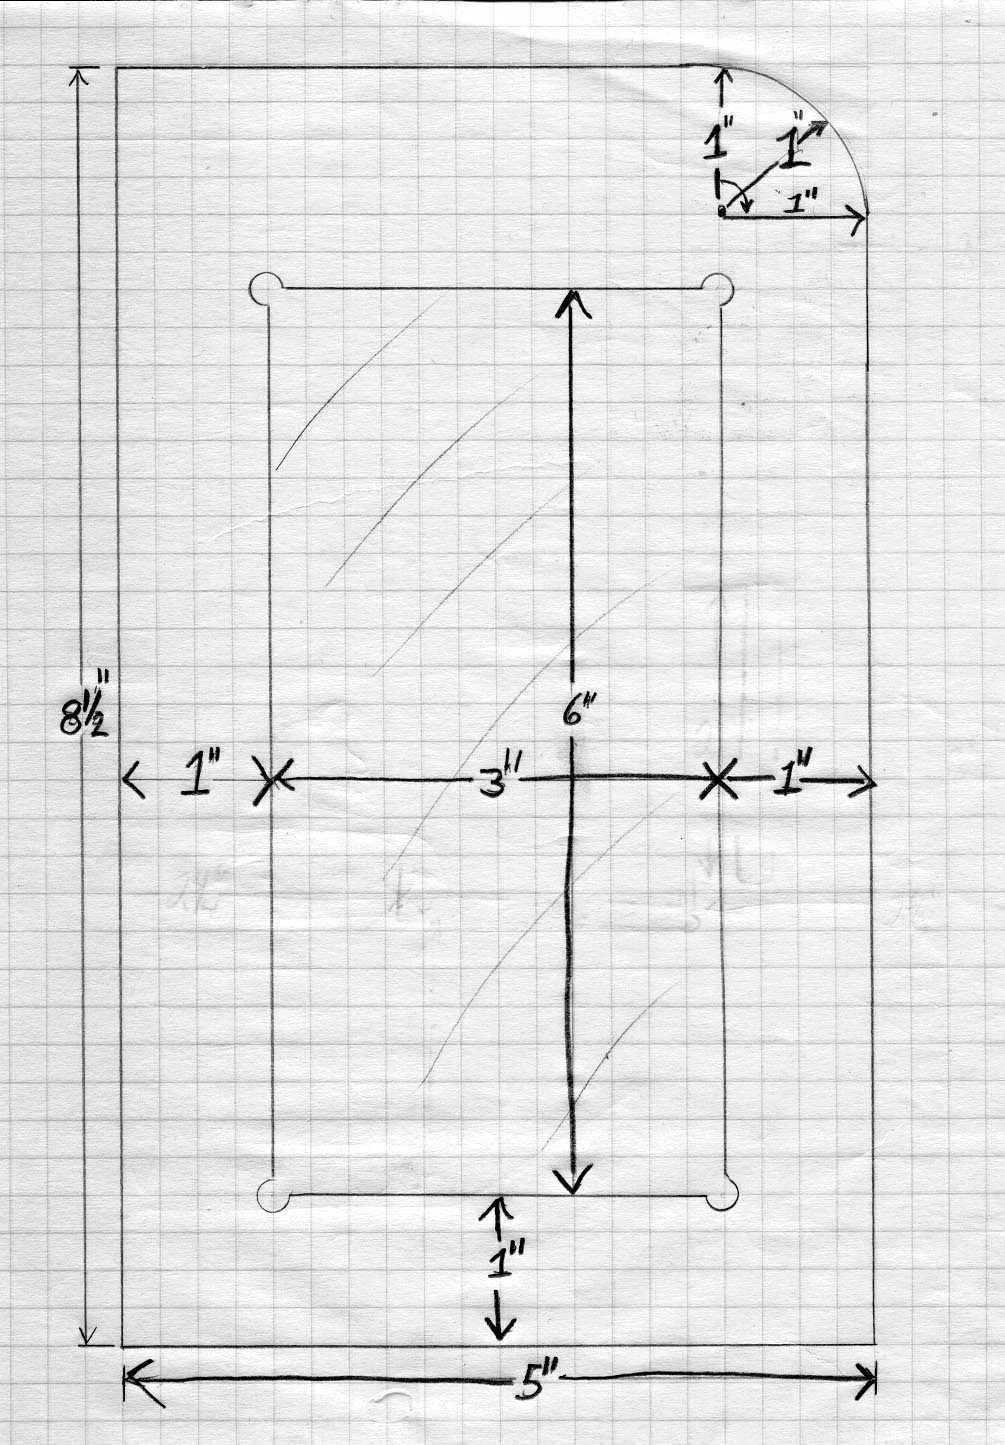
1:1: Scale Drawing – Front
These are hand drawn drawings based on measurements I made using a few different sources. Knowing that the original Mystic Seer was built over the guts of the popular Swami machine, gave me some idea of the overall size. But, knowing the size of the napkin was the biggest clue to all the dimensions.
I used PVC sheet material for construction. Partly because I used it for constructing many parts of my robot but also because it is so easy to work with. My Mystic Seer will not fit over a Swami Machine. If you attempt that, you may have to use sheet metal and/or adjust some of the dimensions. Noticed that my drawing does not have the center point for the key lock. I’ll have to update it at some point.
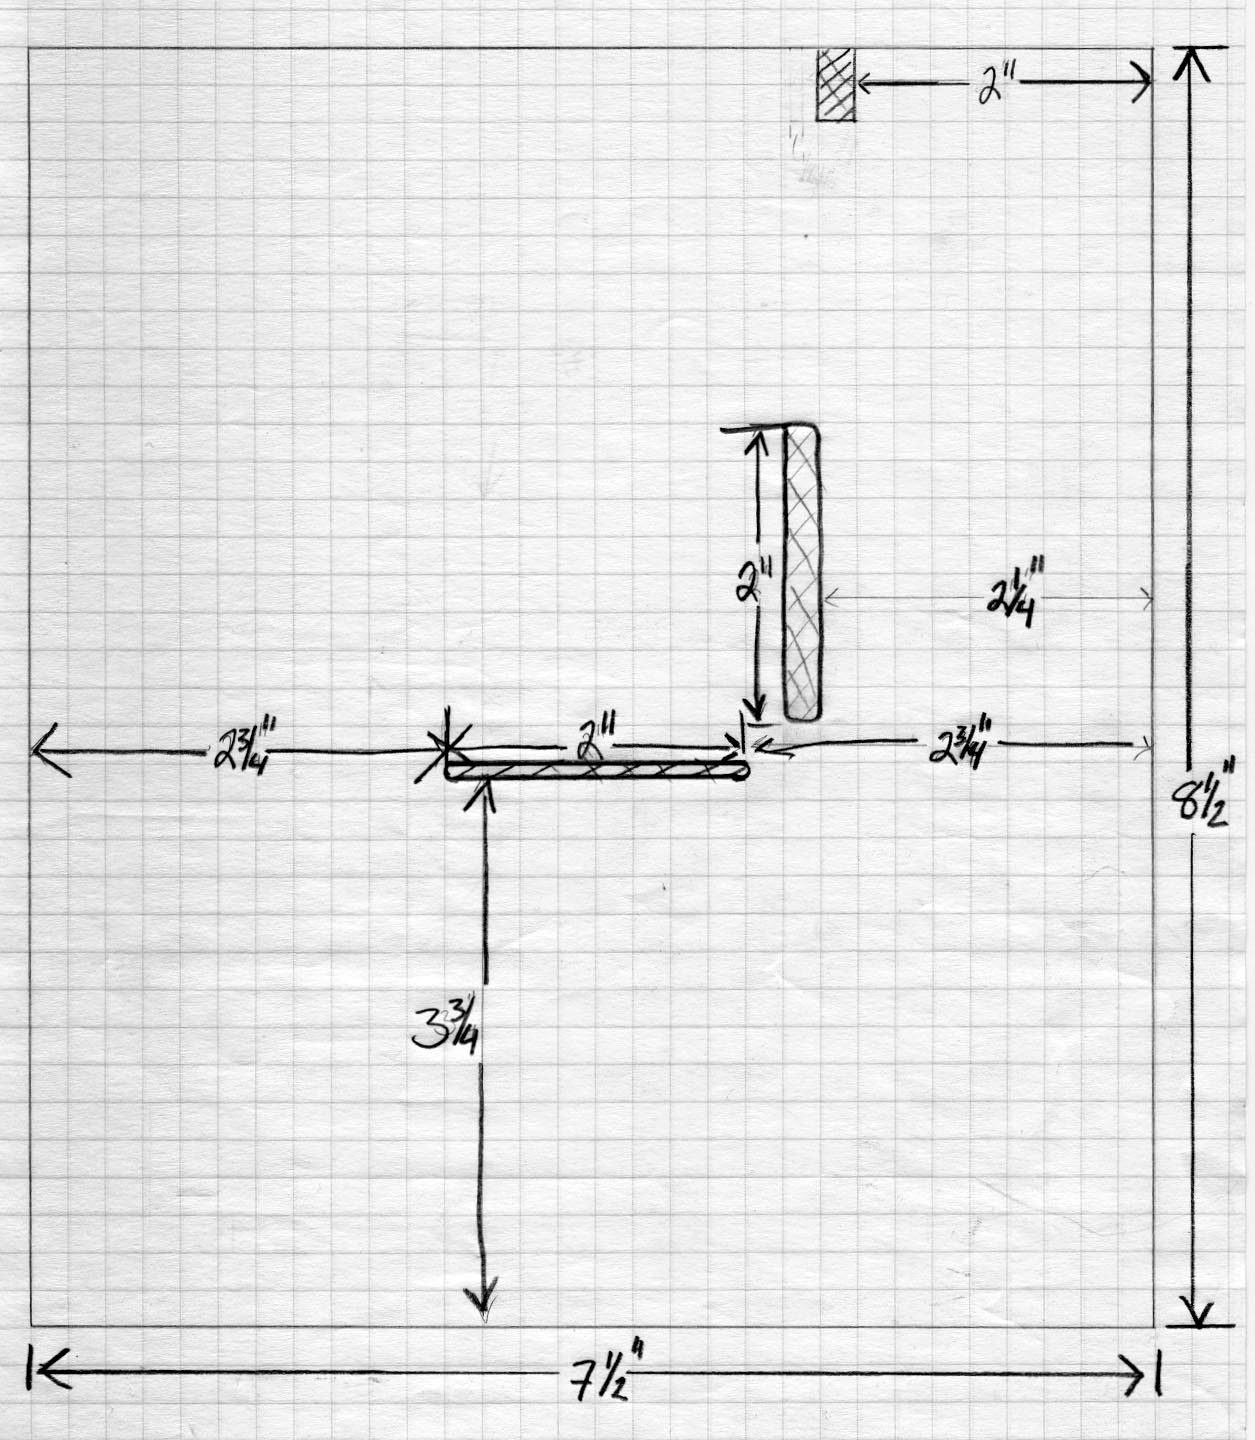
1:1: Scale Drawing – Side
1:1: scale side drawing with dimensions. Here’s where you can see how the napkin helped determine the rest of the dimensions
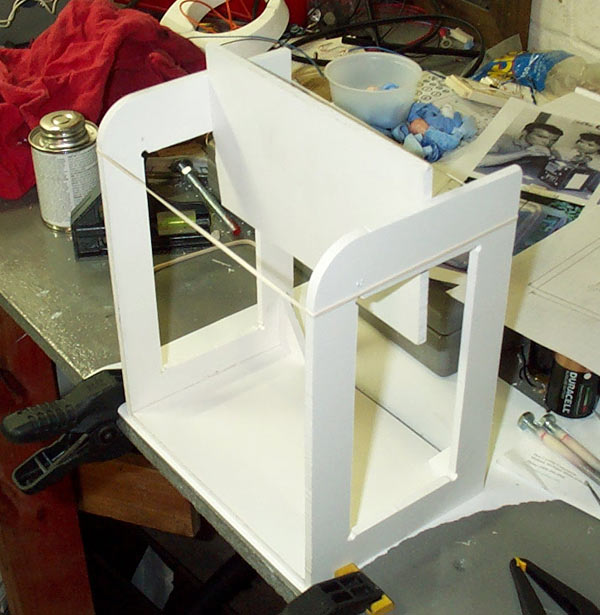
Early Construction
This picture shows an early construction stage of the MS. I have a base and two sides attached. The vertical piece of plastic is just placed between the two sides to hold them while they are being glued to the base.
The green blobs are spot putty used on plastic models. It is made to work with styrene. You could use an automotive “Bondo” type spot putty but it may soften the plastic and not work as well.
Notice the corner brackets “triangles”. They give the sides support in the rear of the machine. They are also set in from the rear the machine by the thickness of the real panel.
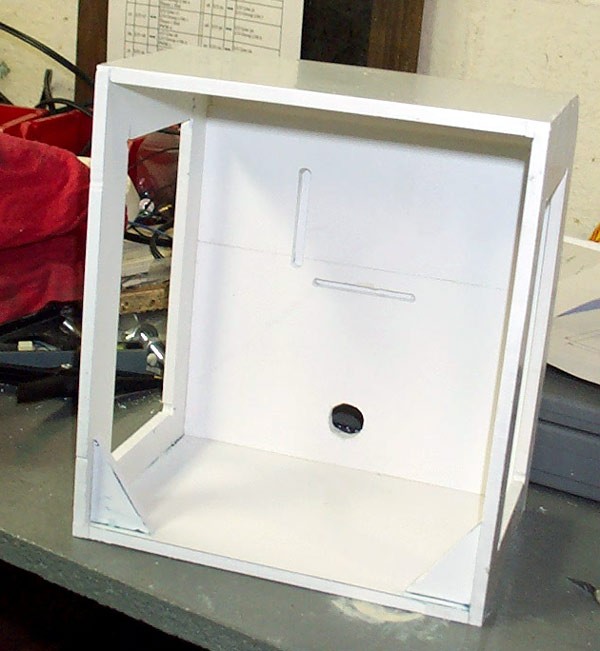
Top & Front in Place
Here you can see the top and front pieces were glued in place before the skin was put on. These pieces provide structural support and a surface to adhere the styrene to.
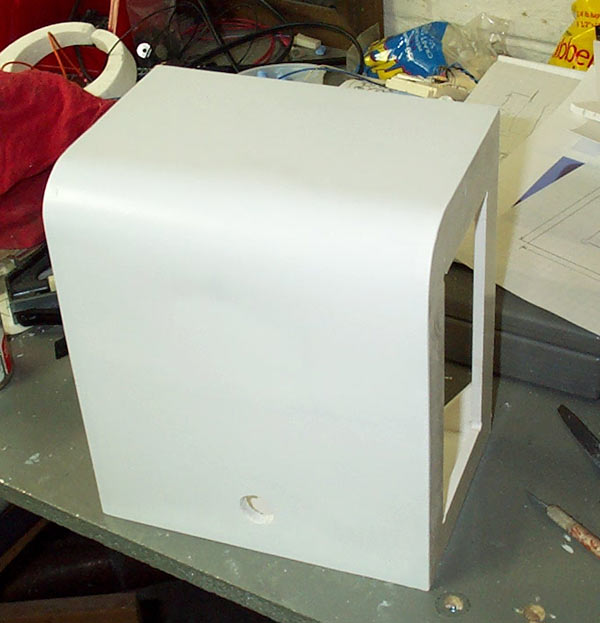
Skinning the Front
I then glued on a piece of styrene plastic sheet material over the top and front. This was the outer skin that provided the curved top/front surface. Then I inverted the box and filled the curved corner with a plastic resin from the inside. This gave quite a bit of strength to the corner.
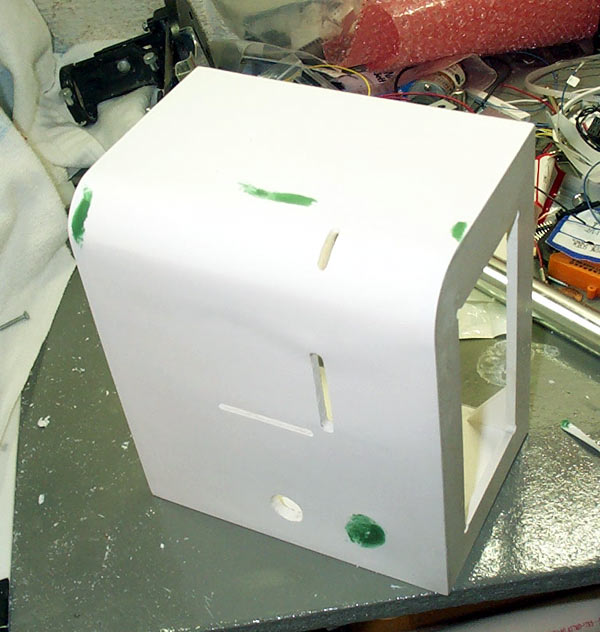
Cutting the Slots
I cut the holes and slots after the skin was put on because I was going through two materials and needed them to line up. I used my Dremel tool. The top coin slot is just big enough for a penny, but dimes also work.
Since my MS was more of a napkin holder/bank, I was tempted to enlarge it big enough for quarters, but wanted to keep it as original as possible, so I didn’t. The green blobs are spot putty used on plastic models. It is made to work with styrene. You could use an automotive “Bondo” type spot putty but it may soften the plastic and not work as well.
Continued in Part 2